
Write-up: solution to a RE crackme
CTFs and challenges mainly based on reverse engineering are a bit uncommon, so when I find one I am always happy to devote some time to try and solve it. This write-up will be on the crackme created by hasherezade. To make the reading more spicy I decided to explain my thought process while going through the challenge, instead of writing a plain (boring) solution.
Stage 1
Step 1
Obvious first step: run the executable. There isn’t any user input, but we are greated with a nice “I am so sorry, you failed! :(“ message. After feeding the exe to IDA, we can directly look at the strings, hoping to find that message. The cross-reference to it leads us to the real main function (at 0x401910). Pretty straight forward, the return value of the function at 0x4014F0 decides whether we fail or succeed. Inside it, the pivot is the function at 0x4031C0, which receives two hardcoded buffers and does the following:
- compute the SHA-256 hash of the second buffer
- generate a AES-256 key from the hash (via
CryptDeriveKey) - decrypt the first buffer using that key
Back to 0x4014F0, the program computes a checksum of the decrypted data and tests it against the harcoded value 0x3B47B2E6. In order to correctly solve this first step we need to get the right key, that is, the right content into the second buffer. This buffer is filled up by the 9 functions (4 bytes each) that are called before the decryption routine. Each function deals with an anti-debug or anti-emulation technique. The anomalous thing is that these functions write in the buffer only if the conditions are met (not bypassed) - the exact opposite of what a malware would do. For example, one of the functions checks for the presence of hardware breakpoints, and only if at least one is set it writes its chunk of data in the buffer.
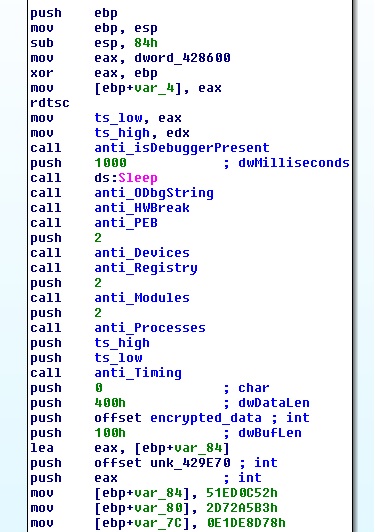
“anti-analysis” functions that write the key
A quick list of the techniques deployed by each function:
IsDebuggerPresent+CheckRemoteDebugggerPresentOutputDebugString- Hardware breakpoints
PEB.BeingDebugged+PEB.NtGlobalFlag- Search known devices, modules and processes: these 3 functions have the same structure, they use the Windows API to get the various names, compute their hash and check them against a list of hardcoded values
- Known VirtualBox registry key: check the existence of the key HKLM\HARDWARE\ACPI\DSDT\VBOX__
- Timing: perform the sequence
rdtsc(ReaD TimeStamp Counter) ->Sleep(1000)->rdtsc
and check the difference between the two values
And a sample of the piece of code that writes the key chunk:
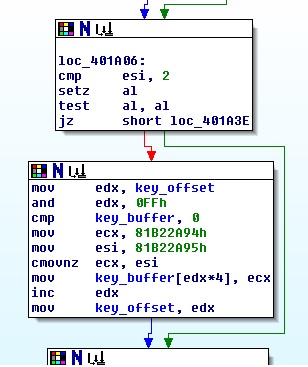
if the conditions is met, write a 4-byte key chunk
Matching all the required conditions gives us the key, and the decrypted data results in a URL: https://pastebin.com/raw/9FugFa91 . At that URL there is some Base64-encoded data.
Step 2
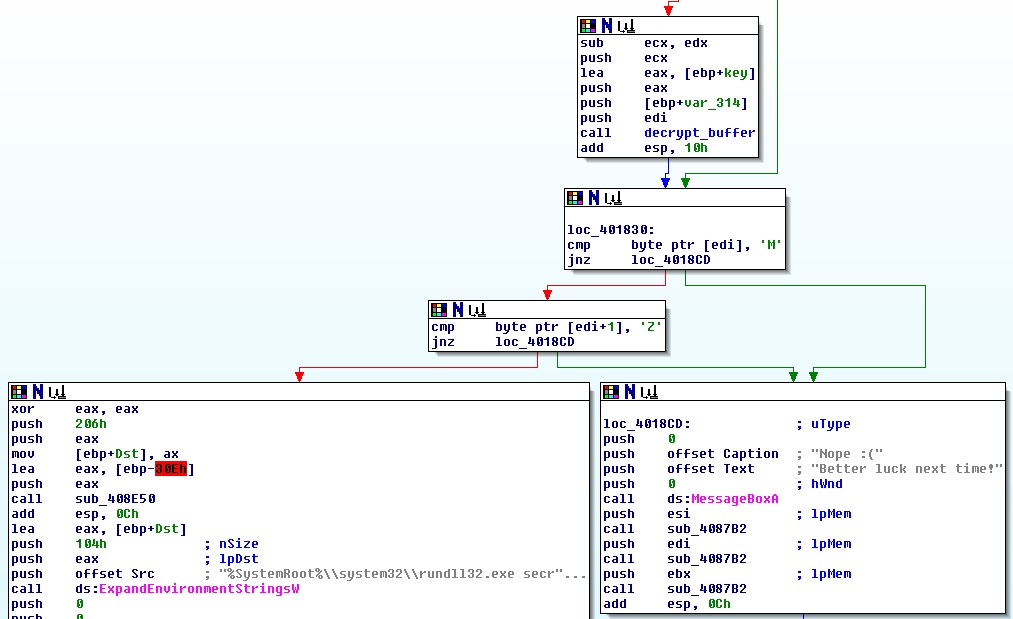
Confident that we have overcome the first challenge, we can let the program continue its execution, but only to be brought back to earth by a message box saying “Better luck next time!”. Once again we need to find its reference, which is inside the function at 0x401690; specifically, the error message is displayed if the first two bytes of a certain memory region are not “MZ”, probably meaning that the region needs to contain a PE file.
To understand what is in that region we need to go through the whole function:
- download the data from the previous URL
- Base64-decode it
- decompress it via RtlDecompressBuffer
- get the content of the clipboard
- XOR-decrypt the decompressed buffer using the clipboard data as key
- check the first bytes of the decrypted buffer
- …
To get the key we can use a simple trick specific to XOR encryption. In general:
N ^ 0 = N
And in our case:
key ^ 00..00 = key
this means that if the original data contains a sufficiently long sequence of null bytes we may be able to get the whole key, or at least to guess it. This condition is easily met considering that the header of a PE file has lots of null-byte regions.
By setting a breakpoint at 0x401828 (i.e just before the decryption routine) we have access to the encrypted data, from which it is pretty clear that the key is “malwarebytes”.
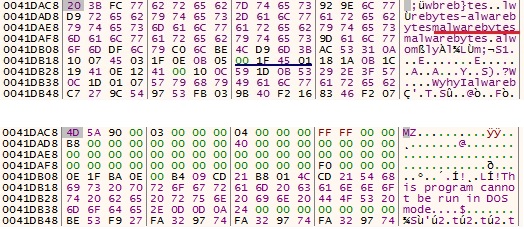
PE file before and after encryption
Once the buffer is correctly decrypted, the program continues by performing a classic process hollowing. Let me summarize the steps:
- create a new suspended process with the command %SystemRoot%\system32\rundll32.exe secret.dll,#1
- in the process memory, allocate a region with RWX permissions
- write the PE file in the new region
- change the base address in the PEB (the location of the PEB is stored in the EBX register)
- change the entry point (stored in the EAX register)
- resume the execution of the process.
PRACTICAL NOTE - how to debug the hollowed process: the cleanest way is to set a breakpoint at 0x40146F (for the crackme). At this point the new process is still suspended, so we can safely attach a debugger without interrupting anything. Moreover, in the EAX register of the crackme there is the new entry point for the hollowed process, therefore we can set a breakpoint point at it (in the debugger attached to the hollowed process of course).
Stage 2
Once again letting the hollowed process run, we get the message “You failed :( Better luck next time!”, which is referenced in the function at 0x401260.
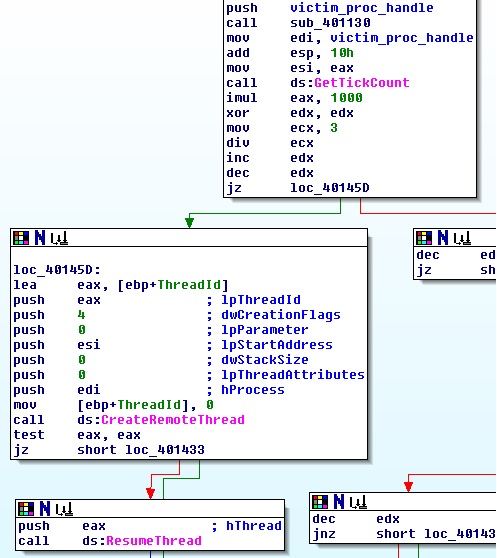
Looking towards the end of the function, its purpose becomes clear: it injects some code in another process and creates a new thread to execute it. Specifically, it uses one of 3 possible API functions to create the thread, namely CreateRemoteThread, RtlCreateUserThread and ZwCreateThreadEx. The choice is made by the randomly generate value (GetTickCount() * 1000) % 3. At this point we need to find which is the victim process and what code is injected.
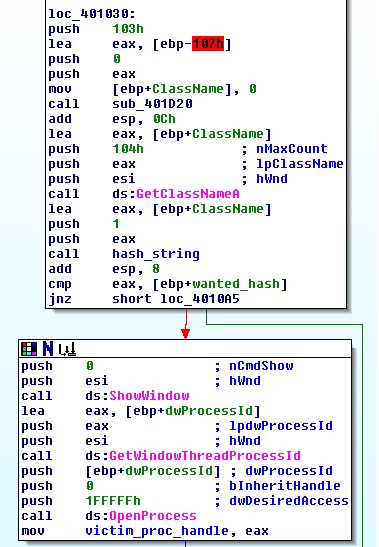
Lets address the first question. Tracing the process handle back from the thread creation APIs we can see that it is stored in a global variable at 0x40EF50. The variable is set in a callback routine of EnumWindows (at 0x401000). For every window, the routine does the following:
- get the window class name (
GetClassNameA) - compute a hash of the name
- check it against the hardcoded value 0x3C5FE025, passed as a parameter by
EnumWindows - if it matches, open the corresponding process and store the handle at 0x40EF50.
Since none of the windows I had in my system matched the required one, here is my personal hack: I let the callback routine run to get the hash of one of the windows I had (I chose the “Process Hacker” window just to be sure it was unique). I then restarted the execution and patched the code at runtime so that EnumWindows would pass the chosen hash, therefore injecting the Process Hacker process.
Regarding the injected code, it is pretty straight forward, since it is stored almost in clear at 0x40E000. “Almost” because the first 4 bytes are the only encrypted part and they are correctly decrypted if the PEB.BeingDebugged flag is set. The injection function is located at 0x401130.
NOTE: the shellcode looks like a sequence of junk instructions, which probably means it is self-modifying code - later I got the confirmation from hasherezade that she used the Metasploit polymorphic encoder shikata ga nai.
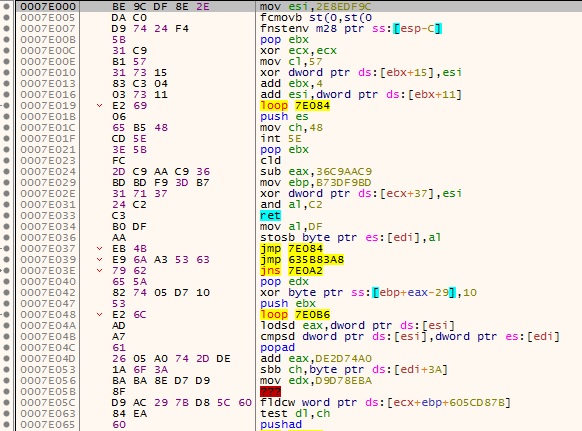
shellcode before self-modification…
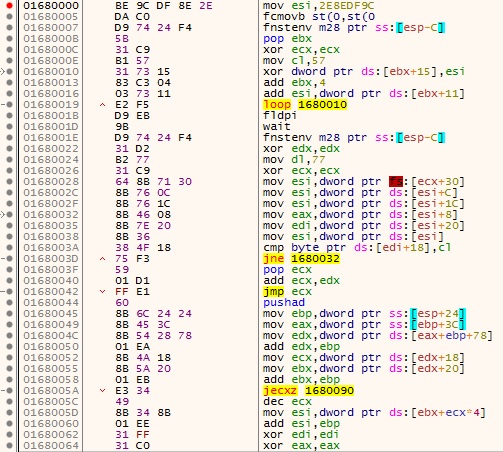
… and after
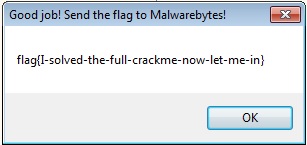
At this point everything is set, so we let the rest of the code run and the final message box pops up, containing the long awaited flag.
Conclusions
Kudos to haserezade for creating a challenge that features many different techniques used by malware, from anti-analysis to process injection. Since these techniques are displayed clearly, without any obfuscation, this is a good reference to learn them, but also a good exercise to redo from time to time to keep things fresh.